Birdseed Ornaments

Every now and again, I like to find a pin from Pinterest and test it out. For this weeks craft, I decided to try to make my own bird feeders, like the ones featured here. This is how they’re supposed to look:

bird-feederTo make these bird feeders, you will need:

2 packets of unflavored Gelatine

2 packets of unflavored Gelatine

20130619-081248.jpg

1.5 cups of birdseed

20130619-081328.jpg

Something to use to hang your feeders. I used hemp because that’s what I had. The original post used twine, but you could probably use just about anything.

You’ll also need some cookie cutters and waxed paper.

To make your bird feeders, bring a 1/2 cup of water to boil on the stove. Once the water boils, remove from heat and add in both packets of gelatine.

20130619-081302.jpgOnce your gelatine is dissolved, stir in your birdseed.

20130619-081315.jpgHere is where normal people would lay their waxed paper down, set a cookie cutter on top of it, fill the cookie cutter half full with your birdseed gelatine mixture, lay your string down and then continue filling it until its level with the top. I did not have any waxed paper, so I Pam’d a cookie sheet and went on with filling my cutters.

20130619-081345.jpgI ended up doubling the recipe, so I had some birdseed left over. Instead of doing more cookie cutters, I wanted to see what would happen if I used a cupcake tin. So I Pam’d that up and filled each spot with seed and a string.

20130619-081356.jpgOnce you have all of your seed distributed, all you have to do now is let them dry. I let mine sit about an hour before I fooled with them. I very gently pushed on seed ornament until it came free from the cookie cutters, and to get the ones out of the cupcake tins, I took a sharp knife and pried them out.

20130619-081429.jpgHere’s one of my cookie cutter feeders! And here are my ornaments from the cupcake tin:

20130619-081441.jpg
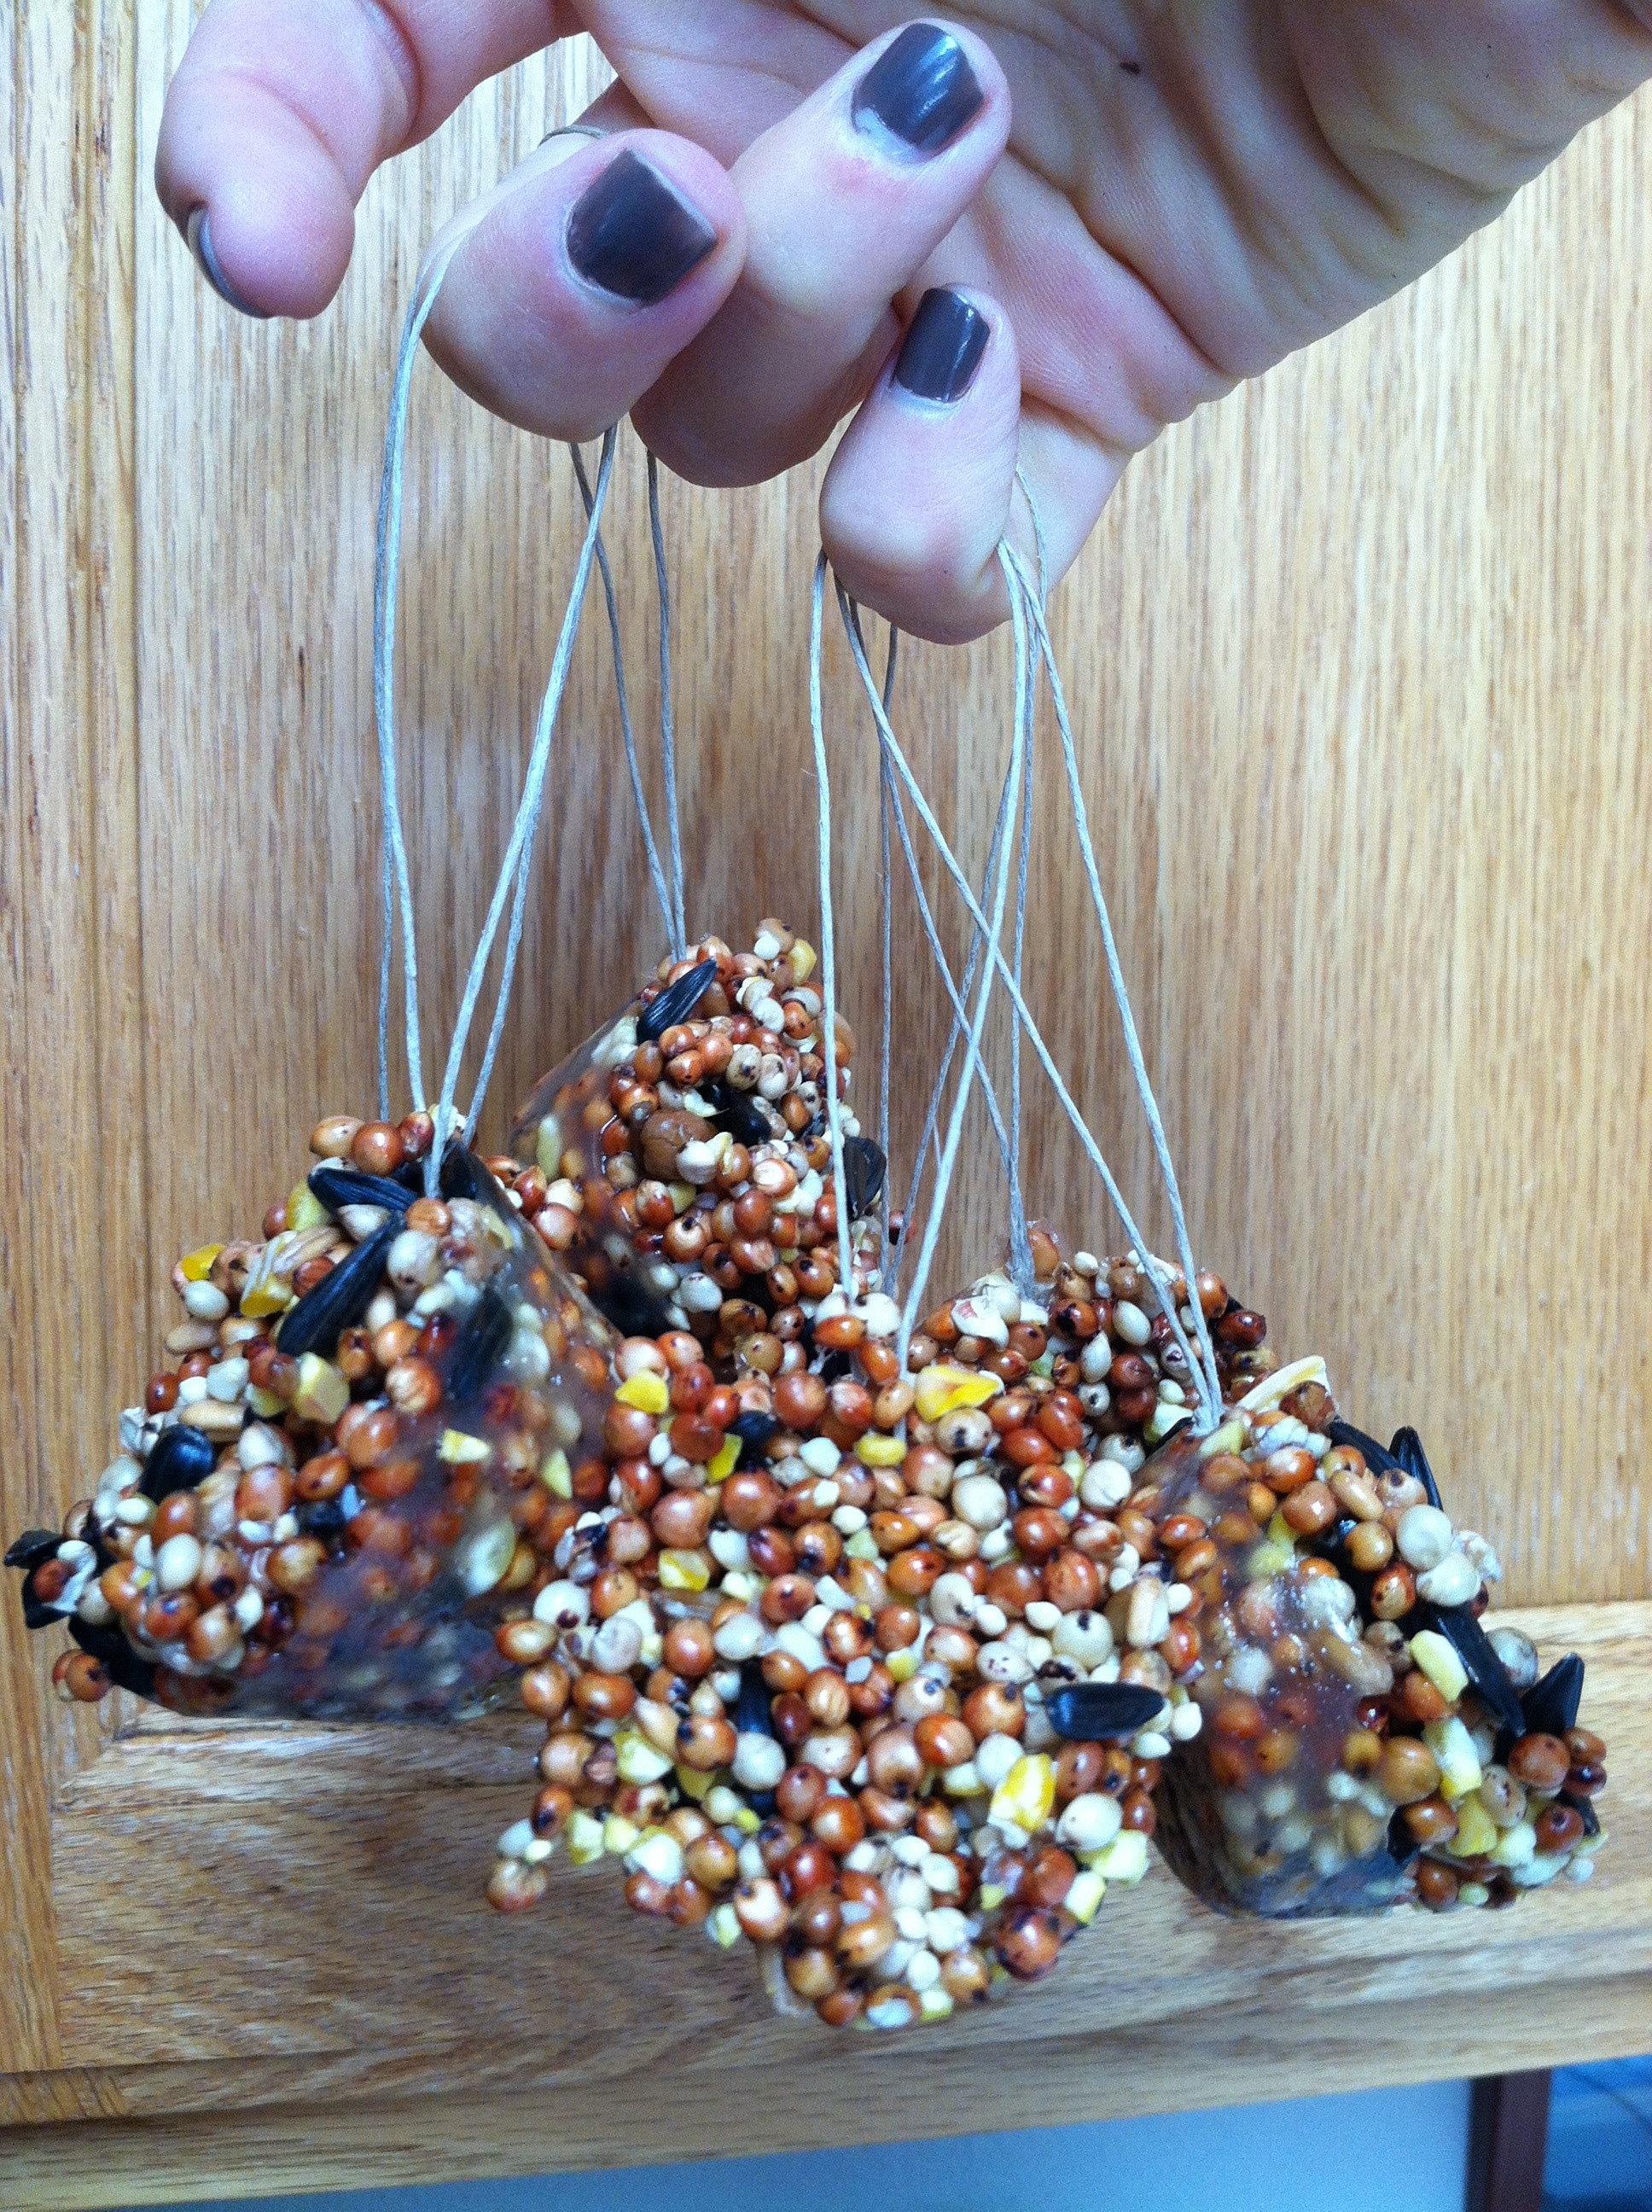
They’re all now hung out in the yard for the birds to enjoy. I’ll definitely have to remember this for winters in Virginia when food becomes scarce for the birds. I’ve also seen another variation on the gelatine/birdseed feeders where someone has taken a bundt pan and created a whole entire wreath to hang in the trees for the birds! Happy Feeding!

Salt Dough Ornaments Revisited

Salt Dough Ornaments Revisited

Not long after I first started this blog, I did a post about making salt dough ornaments to hang on our Easter tree. If you haven’t read it, you can read it here. By the time I was finished working on our Easter tree, I had somewhat decided to continue decorating our tree year round, and I finally got around to making new ornaments for it. Don’t worry, our Easter ones had been taken off a long time ago!

This week, Bubba and I went back into the kitchen to make new salt dough ornaments. The last time I made these ornaments I said that my dough was a little sticky and had to add more flour to the recipe to get it to come out how I wanted them to. Here is what the new recipe is:

Salt Dough Ornaments

1/2 cup salt

1/2 cup water

2 cups flour

*Bake at 250 degrees for 1 1/2 hours on greased cookie sheet or on parchment paper. If you’re making ornaments like us, don’t forget to poke a hole in your ornament before you bake it so you can hang it!

The only difference between the new and old recipe is the doubling of flour. The dough was just way too sticky with only one cup of flour, and by the time I had added enough flour to make it manageable, I should have just used two cups worth in the first place! I also just greased a cookie sheet and baked off my ornaments this way. I can never remember to get parchment paper at the store, and I always have nonstick spray in the house, so what the heck! I also did take a small piece of floral wire and slightly poke my ornaments to keep them flat while they were baking, much like you do with a pie crust when you have to bake it in the oven first before you put the filling in.

Homemade Ornament Tree

Tree with our new ornaments!

And a few up close and personal shots to show you what we made. Bubba had final say in which cookie cutters were used while we were making these.

Yes, it's upside down. I had a moment :(

Upside down tulip. Not on purpose.

Star

Star

Fish, but Bubba calls it his shark.

Daisy

Daisy

And finally, our airplane ornament.

And finally, our airplane ornament.

Now, while I was making these for our tree, I ended up working on a little side project of my own with this salt clay. I ended up making these to hang in my kitchen:

Lighthouse DecorYes, I know. I have a serious lighthouse addiction. And no, I’m not going to go to therapy for it either! I hung these in my kitchen to help brighten up my pantry door.

Before

Before

After

After

I love looking at these while I’m in here making dinner. And all they are are salt dough ornaments painted up with what I like on them and hung by twos with some hemp!


We’s is Pastin’ Ya’ll!

Sorry. I’m watching Coal Miner’s Daughter, my accents done gone and thickened up on me all of a sudden. No, not really, but I do love movies that take place in the country because most of the time the characters sound like people from home…

Anyway, this week’s craft cost me absolutely nothing to make. I didn’t have to go and buy anything at all. Everything was already in the house, and when I can come up with a craft that I don’t have to go buy anything to do, and Bubba gets to do it with me, that sounds like a good time! So, back to what we did this week. In our spare bathroom, or Bubba’s bathroom as the case may be, hangs this picture.

photo 2

These are my husband’s, mine and Bubba’s hands traced and cut out in construction paper. It’s kind of a simple thing, but it is our family, and since Bubba doesn’t have a playroom here to hang it in like it was at the old house, it’s hanging in the guest bath. So to add with the construction paper art, I thought that a collage type thing would be cute on another wall in there.

Problem was, I didn’t have any glue here at the house. So I got on the internet and found out how to MAKE MY OWN GLUE! The recipe is as follows:

Homemade Glue

  • 1 cup flour
  • 1 1/2 cup water
  • 1/3 cup sugar
  • 1 tsp vinegar

All you do is add all of the ingredients in a sauce pan on medium heat and stir until thick! It looks like this when it’s done.

Home made glue ya'll!

Home made glue ya’ll!

It looks like instant mashed potatoes if you ask me, but it didn’t cost me a dime and I know exactly what went in it, that way if Bubba were to try to eat some, I wouldn’t be worried. There’s nothing in there that can harm him, and the best part of all, IT WORKS! I was skeptical, but it really does work. I tested it out on some newspaper before we made our collage. By the way, if you store it in an airtight container, it will last about a week outside of the fridge. The lady who wrote the recipe said that she keeps hers in the fridge and has had her current batch in there for about 6 months. I just put ours in an old Alfredo sauce jar.

So anyway, for Bubba’s bathroom, I found an old picture frame that went with the one that was already in there. I had one in a box that was packed away in the spare room. I took some construction paper and tore it into little bits for us, and I found a black sheet of construction paper for us to paste everything to. I folded it down to size so I knew it would fit our 8X10 frame. After that I wrote a big “P” on it so we would have some lines to guide us as we glued. The “P” is for our last name, I thought a monogram type thing would be cute.

Our bits of paper

Our bits of paper

So this afternoon we sat outside in the wonderful, glorious sunshine and glued until we had our letter as big as I wanted it. Bubba did fairly well helping, but he was more enthralled with the new box of crayons I bought him at the store today, so it was mostly me. Here’s our finished collage.

photo 4

So from here, I filled it in a bit more and let it dry good. After that I trimmed all of the excess black paper off because I didn’t want it to be noticeable in the picture frame, since our hands are the only things in the frame other than the black backing.

photo 1So here she is, all framed up and ready to go on the wall. And here it is hung up in Bubba’s bathroom.

photo 3

I think it’s pretty cute!

photo 4

And here you can kind of see it along with the hand prints. Bubba really seemed to like the idea of being able to stick things together, so I think I’m going to start hold onto all of our ads and newspapers to see if we can’t come up with some other sort of collage project. Maybe one day when we’re out walking we’ll pick up some leaves and things along the way and make a nature collage. Who knows?